Download Microsoft office 2013 Now!

Microsoft has just released the free preview version of the all new Microsoft Office 2013. You can now download Microsoft Office 2013 immediately on your computer to try it.

How to Access Blocked Websites Without Proxy

Access your favorite blocked website and social networking sites at your or college or your workplace without proxy.Download exciting software to access blocked websites.

Make a Very Dangerous Virus with Notepad

Now make your own viruses in Notepad. Make fun with these in your friends computer.

How to remove PDF password

In some PDF files, Owner set the password to that file. It restrict the print, copy or edit the content of PDF file. In such situation PDF password remover application help you to remove password.

How to bypass Surveys on websites

Many websites makes survey to proceed the download or to visit the website. These surveys prove to b headache. To bypass these surveys, there are some tricks to follow.

Wednesday, 16 January 2013

How to Add Any Application to the Windows Desktop Right-Click Menu


If you want really quick access to launch a frequently used application without putting extra icons on your desktop, you can add that application to the context menu for the desktop with a simple registry hack. Here’s how to do it.
Naturally, we’ve also covered the opposite scenario—how to disable Windows context menu, which is an equally useful read if you’ve got a bunch of items you want to remove from the menu.

Adding Applications to the Desktop Context Menu

For today’s lesson we’ll show you how to add Notepad to the menu, but you could add any applications you want instead. The first thing you’ll want to do is open up regedit.exe through the Start Menu search or run box, and then browse down to the following key:

HKEY_CLASSES_ROOT\Directory\Background\shell

The screen should look similar to this one if you are in the right place.
Next, you’ll want to create a new key underneath the shell key, the name of which is exactly what is going to show up on the desktop menu. Right-click on the “shell” key, and then choose New \ Key from the menu.


Give the new key the name that you want to show up on the desktop context menu. For this example we’ll be using Notepad.

 Optional: If you want to assign an “Alt” key to this menu entry for quicker access, you can change the (Default) value on the right and put an & character in front of the key you want to use. For instance, if you wanted to be able to just use the N key to launch Notepad once the desktop context menu pops up, you can do this:
Personally I don’t find this terribly useful since you have to use the mouse to right-click on the desktop… may as well just use the mouse to click the item. Still, for completeness I’ve included it.
Next you’ll need to create the command key that will actually hold the command used to launch the application. Right-click on the new Notepad key, and then choose New \ Key from the menu.
 
 Give this key the name “command” in lowercase.
 To complete this step you’ll need the full path to the application that you want to launch. You can use Shift + Right-Click to get the Copy as Path menu item to find this more quickly. Note: of course, for Notepad you wouldn’t need the full path, but this is just an example.

 Now click on “command” on the left side, and then double-click on the (Default) key in the right side to edit the string value.


Paste in the full path to the executable that you got from the “Copy as Path” step above, or you can put in the full path yourself if you’d like.
Once it’s done, it should look like this:
 And right-clicking on the desktop will produce the new menu item… naturally, using this menu item should launch Notepad.

 You can add as many applications to the desktop context menu as you’d like, just repeat the steps again with a new menu item name.

How to disable Windows Context Menu with CCleaner


One of the messy sides of Windows is its right-click context menu system which seems to get more cluttered every time you install a new program. Here’s how to fix that, the easy way.

Cleaning Your Context Menu With CCleaner

Head over to the Piriform website and download the free version of CCleaner.


Once downloaded, you will need to run through the install wizard which is a next, next, finish process.


When you first fire up CCleaner you will see a Tools section on the left hand side, that’s where we will be heading.


On the right hand side, you will need to head into the Startup section and then click on the Context Menu.


You will now see all of the shell extensions that are registered on your system, after selecting one you have the option of either deleting it for good, or just disabling it incase you wish to re-enable it at a later stage.


That’s all there is to it.

Tuesday, 8 January 2013

File Shredder: Delete forever


When you "delete" a file in Windows, it's not entirely erased from your hard drive.

The Delete function simply hides the file till the space it occupies is overwritten with new data. Still, specialized file recovery software can retrieve these files easily (see Recuva). So how do you get rid of a sensitive file permanently?

File Shredder is a simple tool that gets the job done by 'writing' over the files multiple times with random binary data. Start the program, select the files and shred them with a button. Simple.

In the Settings tab, you can choose the type of encryption you want to use to shred the file. There's also an option to Shred Free Disk Space. As we said, a file isn't completely gone when you delete it; which means it's still occupying some space. File Shredder purges this data by rewriting over it as well.


Download Link: File Shredder

Recuva: Recover Un-delete data


Deleted a file by mistake? Unfortunately, there's no 'undo' button for that. But don't worry, it's not completely gone. Unless you used a shredding tool (see File Shredder), the file can be recovered with a nifty program called Recuva.

When you run the program, you are prompted by a pop-up to choose the type of file you're looking to 'undelete', whether pictures, music, documents, etc. Next, choose the drive where it was located or the whole PC itself. Before finishing, you will be asked whether you want to perform a 'deep scan' - check this option only if Recuva is unable to find your file in the first try. Files found in the scan are marked either green (easy to recover), yellow (difficult to recover) or red (permanently deleted). Sometimes, the file's name might not be identifiable, but you can try the thumbnail preview or use your own judgment to figure out whether that's the file you were looking for. Once you locate your file, click 'Recuva' and save it to your hard drive.


Download Link: Recuva

Tera Copy: Fast Copy Manager


The default copy tool in Windows is bothersome if you deal with huge files. If there's an error while copying multiple files, it'll abort the whole job. Also, there's no way to pause and resume a transfer. And did you know that Windows doesn't actually copy files at the fastest rate possible?

TeraCopy to the rescue. The software features full shell integration, which means that it replaces the default Explorer copy tool so you don't have to start the program each time you are copying files.

While transferring, if there is an error, TeraCopy will try multiple times to copy that file - and if that doesn't happen, the file is skipped and the rest of the data is copied. At the end of the process, you can see which files posed a problem and try copying them again.

What's more, you can even pause and resume the process if you need to run a more resource intensive program alongside. And yes, the software is optimized to get the fastest possible transfer speed on your computer.


Download lonik: codesector.com/teracopy

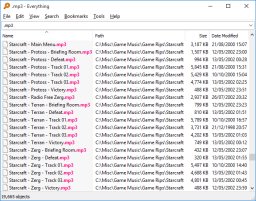
Everything:Tool for instant search


With huge hard drives being the norm, searching for any document on your PC can be a painstakingly slow exercise. This is because every time you search using the default tool in Windows, it has to scan each and every folder till it finds the file. Everything, on the other hand, helps you locate any document almost instantly.

The first time you install the software, it indexes the contents on your hard drive. The program then sits unobtrusively in your system tray till you double-click its icon. To search, simply type the name of the file you are looking for, and the software will serve it up to you - no wait whatsoever. You can also search by file extension and add strings for custom searches. For example, use 'office\invoice' to search for filenames with the word 'invoice' in your 'office' folder, or 'Beatles! Love' to exclude the term 'Love' from your search.


Download Link: www.voidtools.com

Saturday, 5 January 2013

Samsung Galaxy S IV coming in May 2013

Samsung is again readying a big launch for the month of May. The company which unveiled its flagship smartphone Galaxy S3 in May last year, is reportedly launching its successor Samsung Galaxy S IV in May 2013.


The speculations have been fuelled by a post from Samsung Lebanon on Facebook saying that the upcoming Galaxy S IV will not launch before May 2013. Facebook user Anthony Ghattas posted a question on Samsung Lebanon's page on the social networking website, asking, "Hey, is there any news for the Samsung Galaxy S4 release?" The reply he received from the company was "The Galaxy SIV won't be released before May 2013."

Sammobile, a tech blog, has also revealed leaked press shots of the Galaxy S IV. The blog noticed that "the device will use on-screen buttons as there is no home-button present on the device, the bezel around the device is much thinner and the device features a large display."

Rumours say that the upcoming flagship will have a 4.99-inch SuperAMOLED touchscreen with 441ppi pixel density. According to a Wall Street Journal report, the display of the device will be unbreakable, while rumours also suggest that it will also be bendable. Speculations are also rife that the device will be powered by a 2GHz quad-core processor and sport a 13MP camera on the back.

Thursday, 3 January 2013

SIM Cloning Tools

SIM cards grant access to cell phones on the GSM network and store vital information about the phone, the user account and contacts. A SIM card that is damaged, lost or stolen can mean lost contacts, lost time and, in business, lost profits. Fortunately, there are several SIM cloning tools that make a copy of a SIM card to use as a replacement.

Datopal 12 in One SIM Card Cloner

This SIM card cloner is an attachment that plugs into the USB port of any PC. It has one data port that is designed to fit several different SIM card sizes, and it supports SIM cards with 32k to 64k GSM SIM V1 formatting. The Datopal device reads several types of SIM card, but writes to a special SIM card that can hold the information of up to 12 different SIM cards on its single chip. The data can then be selected and used in any GSM phone. Although the Super SIM card can be used on the same network as a service provider-issued SIM card, using the same number on two phones at the same time can cause problems with the number, up to and including being locked out of the phone number by the phone's service provider.

Multi Slots USB 2.0 SIM Card SD MMC Card Reader Writer

As the name suggests, this SIM card cloner has multiple slots, allowing for simultaneous cloning and transferring of SIM information from one card to another. This cloner connects to the computer using a USB 2.0 input. It features 480 Mbps transfer rates, and comes with a software CD with step-by-step instructions on how to clone, back up and transfer SIM card information such as phone books, network passwords and other important SIM information. The dual slots on this SIM cloner fit four different types of SIM card configurations.

Techie Warehouse SIM Card Backup

The SIM card reader, writer, cloner and backup device offered by Techie Warehouse.com is an all-in-one SIM card cloner that operates independently from the computer. This backup device requires no software installation and is small enough to fit in a pocket. The memory in the unit can store up to 500 SIM cards, which can then be transcribed to a new SIM card in the event of accident or theft. The device, which is compatible with all types of SIM cards, features a status display and a four-button control panel.


How to clone a SIM card

Things You'll need:

  1. Sim Card
  2. Sim card duplicator

Instructions:

1. First you'll need the IMSI (International Mobile Subscriber Identifier) number. This string of numbers is usually imprinted on the SIM card itself. This is an example of an IMSI number:
IMSI:429011234567890
An IMSI is usually 15 digits long, but can be one or two digits shorter.

2. Now you have your IMSI number you'll need the authentication key (Ki), which is unique to your SIM. This number can only be discovered electronically using a SIM duplicator, which is an external device that you will slot the SIM card into.
A SIM duplicator is relatively inexpensive - they can be found at around the $10 mark - and can be purchased at multiple locations. A Google search for 'Super SIM' will turn up at least several online outlets.


3.When the SIM duplicator is connected to your PC and your SIM card, it will attempt to acquire the Ki number and copy the entire contents. When a new SIM card is placed into the duplicator after this process is complete, that data will be copied and, for all intents and purposes, the new SIM will be identical to the old.

Ubuntu is coming to samrtphones, but will anyone use it?

Ubuntu has long been a favorite Linux desktop operating system for open-source fanatics and those who like to tinker with their technology. Now it's stepping out into a new frontier: Mobile.

Ubuntu developer Canonical unveiled a new interface on Monday re-imagined for touch devices, with a design that borrows cues from Android and Windows 8. The hard sell here isn't simply that Ubuntu now works on mobile devices. Canonical hopes that future devices will not only run the new mobile OS, but will also boot the desktop variant of Ubuntu when docked to a keyboard, mouse and monitor.That would let you literally use your phone to power your PC.   
This concept isn't entirely new, as Canonical revealed similar plans last year to attach its desktop software to devices running Android. Before that, Motorola tried to turn Android phones into laptops with its Atrix line of phones and docks. And let's not forget the hybrid operating system experiment that is Windows 8. 
But no one not even Microsoft has attempted to serve up its own phone OS and desktop OS in a single package. Despite its desktop-like features, Android considers itself a phone and tablet system, while Microsoft still has Windows Phone 8 operating autonomously from the tablet and desktop-centric Windows 8.

Is Ubuntu's new creation good enough to make even the tiniest inroads against the likes of Android, Apple's iOS and Windows Phone?

How To Use Google Cache to Bypass Firewall

Many time you might come across lot of sites which are blocked by your company firewall. This might be due to occasional usage of F Bomb. On other cases, there might be instances where site might be down. On all these instances, Google has a solution.

This allows you to view the site from when Google last indexed. Google caches all the website which can be viewed using the keyword cache:websitename.com. 

How to Clone a Mobile Phone Without a SIM Card

As a Technology enthusiast, you try to explore  the possibilities of what you can do with your cell phone.ou can use your cloned phone as your personal phone and the original phone as your office phone. Cloned phone can also serve as a backup on cases where you have lost your original phone. What ever your reasons are, just follow these simple steps to, quickly clone your phone.

Steps to Clone a Mobile Phone without using a SIM Card.
  • On your Original Mobile Phone, try to identify the security menu. If you are unable to find the security menu, kindly search the Internet. Since, locating the security menu is different in each mobile phones.
  • Make a note of the model number of your Original Mobile phone which can be located in the box or at the back of your Mobile phone below the battery area.
  • Make a note of the phone’s ESN(Electronic Serial Number). This is the identifier that is automatically sent to the cellular tower whenever the Mobile phone is in use. The Electronic Serial Number is validated, every time you make a phone call. The ESN is usually your serial number. Even ESN can be found behind the battery of your phone.
  • On your Second Mobile Phone, try to identify the security menu and the ESN identifier. This information is needed in order to duplicate the information from your current phone.
  • Locate the code to change your phone number. This special code is used to change the ESN of each phone. You can find sites on the Internet that will provide you with the code to change the phone number. For Nokia phones, the secret menu is *3001#12345#, and the number changer is #639#.
  • Change the phone number in your Second Mobile phone to match the ESN number of your Original Mobile phone. Power on the phone and make a test call.
A word of caution: If you receive a call when both your Mobile phones are switched on, then both the phones may ring.

This is just a tutorial for educational purposes. I am not responsible for you action.

Search